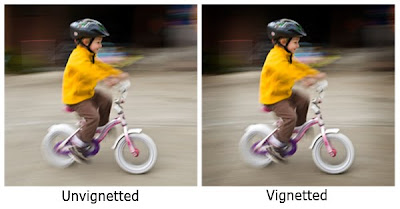
I confess. I'm a Photoshop novice. I used to use the primitve burn and dodge tools in Photoshop to create a vignette. Then I learned a more sophisticated way to create a better vignette using a second layer. But this one, from Scott Kelby, author and Photoshop expert, is an easier and more effective method of vignetting images. Here's how you do it. (Since we're Mac snobs I'm including the Mac "command" key in the text; if you have a PC—and you know who you are—you'll substitute the "control" key, whatever that is.
After opening the image, add a layer (command-J). Set the blend mode to “multiply” and choose the “marquee” tool to create an area you wish to vignette. Choose “refine edge” from the radio button at the top of the screen, and change “feather” to 200 pixels. (You can lower that for lower resolution images). Hit “OK”, then “delete”, and “command-D”, which will leave a soft vignette around your image. You can then change the opacity slider from 100% to something less to suit your taste. This beats playing around with the burning or dodging tools by a long shot.

No comments:
Post a Comment